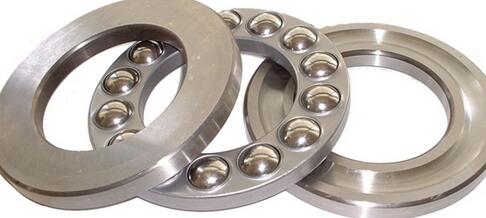
During the operation of the INA bearing, due to various complex reasons, such as unreasonable structure, poor material quality, low performance, defects on the working surface, shock, vibration, improper installation and poor lubrication, etc., can cause early bearing failure. However, in some cases, some bearings are not put into use (operation) at all, but the original complete appearance of the user is damaged during the installation process, and the usability is lost, resulting in premature bearing failure. What this article is about to reveal is a practical example of this type of failure.
The effect of grinding quality on premature bearing failure It can be determined from the above test results that grinding cracks and grinding burns on one side of the raceway are a direct cause of ring cracking and premature bearing failure. The macroscopic morphology of cracks and the distribution characteristics of grinding burns indicate that the original position of the raceway is too deviated or the R of the raceway is not round, which increases the grinding allowance on one side of the raceway. When the cutting speed is high, uneven grinding occurs throughout the raceway. If the grinding wheel is not trimmed in time, it will cause the grinding debris to be embedded or adhered, causing the grinding wheel pores to be blocked and passivated, which will cause the unbalance of the grinding wheel to increase, the vibration of the spindle to increase, and even the vibration of the machine tool to cause grinding chatter. Obviously, the grinding force changes periodically, forming intermittent burn strips.
In this way, the rate of friction and grinding force in the grinding zone will inevitably increase, resulting in higher grinding heat. When the instantaneous surface temperature of the grinding zone reaches or exceeds Acm, the partially ground surface of the raceway will be re-austenitized. At this time, the volume expands, and the low temperature part of the inner layer hinders its expansion, resulting in thermal stress in which the surface compresses and the inner layer expands. When the grinding wheel is separated from the grinding surface. Under the quenching condition of the external coolant (even if it is air cooling), the austenitized thin layer on the surface is re-annealed for the second time to form a high-hardness secondary quenching structure, that is "Grinding the white layer". At the same time, due to the penetration and diffusion of the grinding heat inward and its adjacent layers, a black "over-tempered layer" with lower hardness is formed. High temperature gradient, resulting in a series of changes in structure and mechanical properties. The "grinding white layer" is in a state of compressive stress, while the "overtempered layer" is in a state of maximum tensile stress, so the crack core is most likely to be in the state of compressive stress. This initiation, especially at the interface between the "grinding white layer" and the "overtempered layer," because this is where the most obvious abrupt change in the structure occurs, the tensile stress is the most concentrated, and the strength is the weakest. When the residual tensile stress value is greater than the material's When the breaking strength is reached, the crack will expand in the radial direction, causing the surface layer to break, that is, grinding crack.


